I have to admit to becoming a paint brush geek. I’ve gone from being completely indifferent to treating them with a care that borders on the unhealthy. And the person most responsible for my pious conversion to this good practice is my friend, and fellow painter, Miguel Coronado. Seeing the way in which he fusses over them, cleaning, lathering and restoring, made me envy his collection of ox-hair oil paint brushes, which are always in perfect condition and primed for the job at hand.
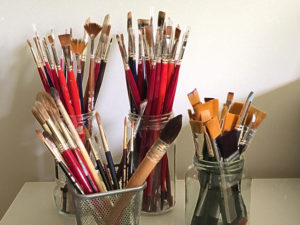 I now love to wash my most treasured paintbrushes — my quality synthetic brushes, not to mention my ox-hair, mongoose-hair and Kolinsky sable-hair ones — and leave them as new.
You just can’t buy the satisfaction gained from a paintbrush in good condition, provided, of course, that you appreciate the small pleasures to be had from brushstrokes: leaving just the mark you want on the canvas, mixing the colour just the way you choose, the feel of the fibres as they bend with the pressure of your hand, and of the paint as you load it onto the brush and deposit it onto the canvas.
If you’re not too bothered about how you apply your paint and purposely practise a more slapdash application (which is perfectly acceptable), then none of these considerations really concern you and you may as well read another post and not waste any more time on this one, or, better still, you can get down to some painting.
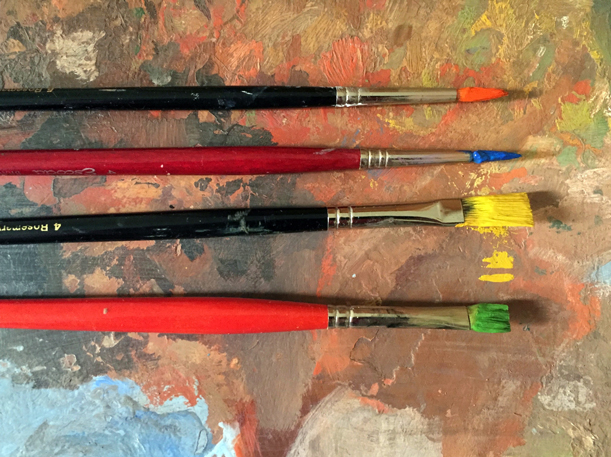
Each brush has its own peculiarities, but there aren’t a lot of differences between them when it comes to cleaning, and by following a few simple, effective steps you can keep them just like new, always. I’m talking about cleaning oil brushes here, since it’s really easy to wash watercolour brushes with soap and water, due to the watery nature of the medium.
During a painting session, I normally keep a jar of turpentine or odourless white spirit for removing any excess paint as I go along using different colours, but you should try to avoid leaving your brushes head down in such a jar because the bristles will promptly bend and lose shape.
You have two options at the conclusion of a painting session:
You can put the cleaning off and leave it for another day without ruining your brushes
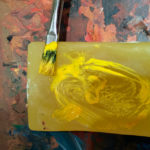
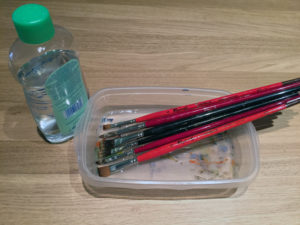 If, for whatever reason, you don’t have time to clean your brushes (or just don’t feel like it), there’s something simple you can do: leave them on a flat plastic tray, immersed in liquid and lying lengthways on the bottom so that the bristles don’t lose their shape. You can just use water in the tray, but you’ll get even better results if you use baby oil. Oxidation causes oil colours to dry out, so if you can prevent them from being in contact with air, you’ll avoid the paint from going hard. What’s more, with baby oil, the paint comes off and dissolves, while the natural bristles get nourished.
As you can see, this isn’t about cleaning the brushes yet — it’s just about preventing the paint from drying on them. If you protect your brushes in this way, you’ll still be able to use them the day after, as the paint won’t have hardened. You just have to take the usual precaution of not contaminating whatever colours you’re going to mix because there’s always a small bit of paint left on the brushes. If you use each brush within its tonal range, then by simply dipping it briefly in turpentine and removing any excess paint with a cloth, you can load new paint from the same colour scheme as that of the brush and carry on working.
Cleaning your brushes: an undervalued Zen activity
When you have a bit more time on your hands and feel like cleaning your brushes, you can move on to the cleaning protocol (it’ll soon be taking you no time at all because it’s like a Zen activity that you’ll end up getting hooked on).
- If your brushes are already immersed in baby oil, then shake them well to get rid of most of the paint and use a cloth or some kitchen paper to remove any excess.
- They’re now ready for the final wash.
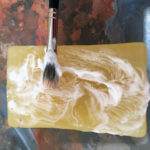
You can do this with various detergents and soaps, but the easiest way is to use ordinary bars of glycerine soap, available in many supermarkets. A bar of soap has the advantage of providing a surface to rub your brushes against. This simplifies the process a great deal, while it also lets you see if any colour from the brush is still being left on the soap. When your rubbing only produces white lather, it means that your brush is now clean.
Rub your brush in lukewarm, running water until no more colour is left on the bar of soap. Rinse the brush well. Think of it as the head of a furry little animal. Your little pet, as it were. Now, I’m not going to ask you to comb it, but you should give it a good rinse.
The last part involves smoothing the bristles back into shape. As you rinse your brush in the running water, use your fingers to return it to its correct shape by smoothing down any bristles that may have been left out of place after being rubbed against the soap.
Finally, you should dry them with a bit of paper and get them all into shape.
If you want to become a card-carrying member of the geek club, and you’re going on holiday for a few days, you can now apply a little styling foam to your brush. This will leave the bristles better set than Justin Bieber’s thatch.
I’ve seen how other members of the paintbrush geek club still use the original plastic tubes that are designed to protect the brushes, and which I normally lose on the first day. Some of them even design special contraptions for placing their brushes upside down — without allowing the bristles to touch anything, of course — because they claim that if the brushes are left standing in a jar, then any water left over from the cleaning process can penetrate the base of the bristles and weaken them. I find that a bit over the top, personally.
Some aspects of the cleaning process that you should bear in mind:
Some bristles retain more pigment than others. Natural hairs tend to keep their colour and hardly change tone at all. Natural hog bristle is the exception to this as it stains easily, but that doesn’t prevent it from working well.
You just have to take particular care to clean the base of the fibers properly, where they’re joined to the ferrule. It’s an area where paint is inevitably going to accumulate, and if you don’t clean the build-up properly, then over time it will cause the brush to lose flexibility, completely changing its action and contributing to a loss of hairs or fibers.
This is especially true of cheap brushes — when left on a tray and immersed in water, the wooden handles can swell up, forcing the paint that covers them to peel off. This fluctuation in the size of the handles can weaken the ferrules and leave them loose. As I say, this is a common occurrence with mediocre brushes, but it rarely happens with quality ones.
If you take care of your most prized brushes and pamper them properly, they’ll give you a lot of pleasure and many years of service. Enjoy them and make great art with them!


michael kelly
September 1, 2016 5:42 pmEnjoyed your comments about cleaning brushes, I too fuss over my brushes, mostly bristles….. some years ago an elderly Russian lady showed me how she cleaned her brushes like me , at the end of a day , in soap and warm water. She would then wrap the bristles and tops of the ferules in strips of paper towel, roll them round several times and wet the paper edge so it would stay rolled up, and let them dry overnight. I have used this technique ever since and find the brushes keep their shape and last much longer. Regards michael kelly
Angel Alvarez de Benito
October 24, 2016 1:25 pmThanks for your useful tip Michael. kind regards